Add a Windows Network Drive
The Network Drive feature is used to extend storage space. You can store recordings and backup files to a network drive. In this topic, we introduce how to add a shared folder on Windows 10 and mount the shared folder to UC-Series VoIP PBX.
Configuration Example
- Create a shared folder in Windows 10 PC and make sure that the computer is always in service.
- Create a folder on the computer, and give a name to the folder.
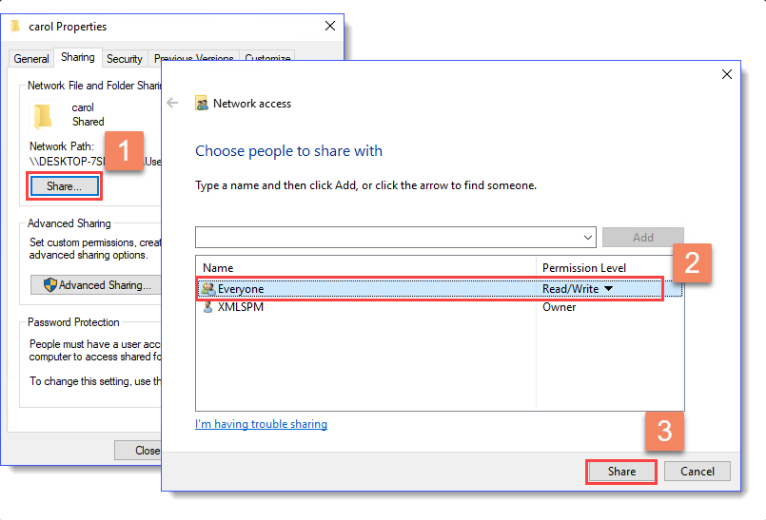
- Right click the folder, select Properties > Sharing.
- Click Share…, configure the Share properties.
Share the folder to Everyone, set the Permission Level to Read/Write, then click Share.
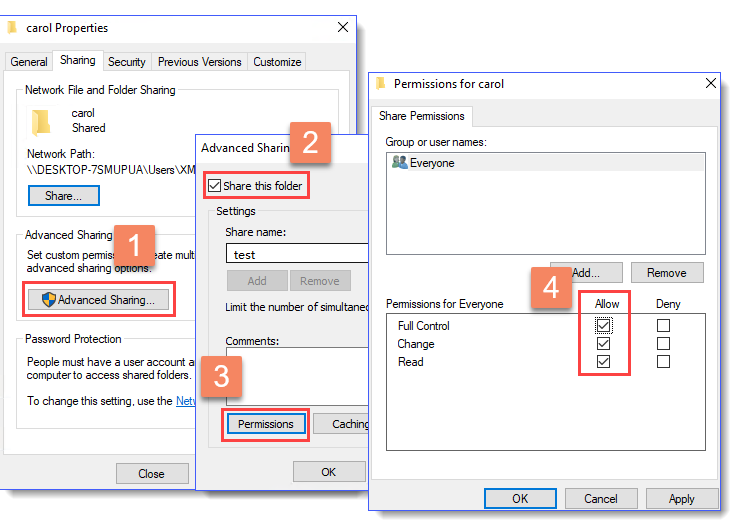
4. Click Advanced Sharing…, configure advanced Share properties.
Select the checkbox of Share this folder, allow all the permissions, then click OK.
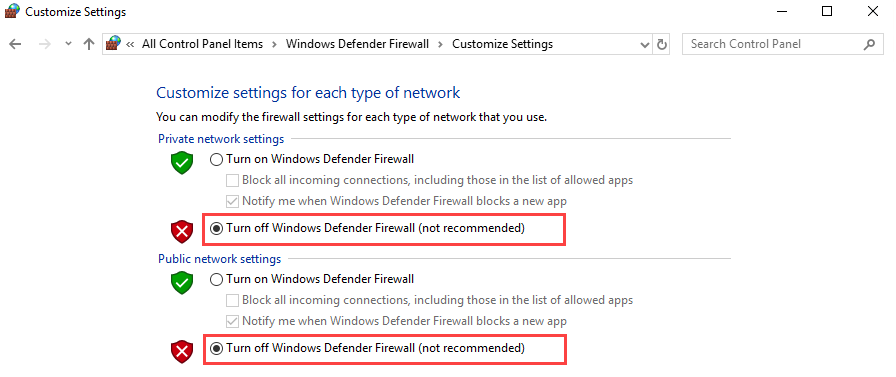
2. Turn off Windows Defender Firewall to ensure that PBX can access the Windows computer.
-
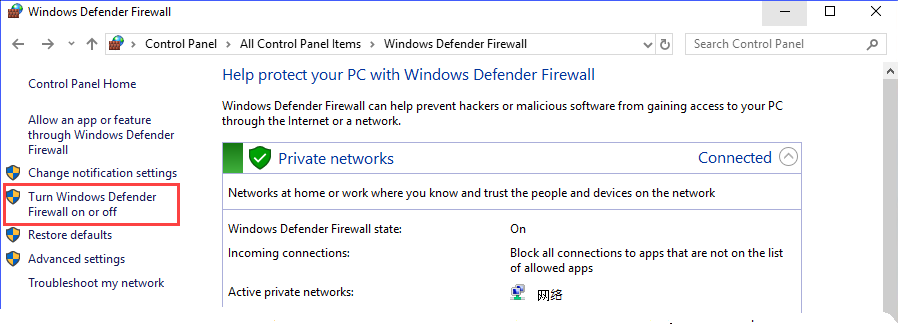
- Go to Control Panel > Windows Defender Firewall.
- Click Turn Windows Defender Firewall on or off.
3. Select Turn off Windows Defender Firewall (not recommended).
4. Click OK.
3. Mount the shared folder to PBX.
-
- Log in the PBX web interface, go to System > Storage > Storage Devices, click Add Network Drive.
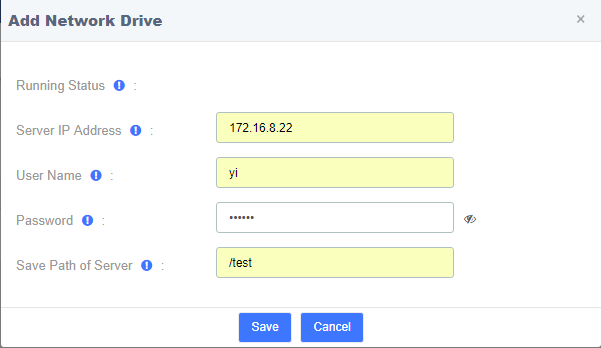
2. In the Add Network Drive dialog box, configure the following settings.
-
-
- Server IP Address: Enter the IP address of the Windows PC.
- User Name: Enter the login name of the Windows PC.
- Password: Enter the password of the Windows PC.
- Save Path of Server: Enter the directory of the share folder.
-
3. Click Save.
If the configurations are correct, you can see the network drive in the Storage Device list.

Network Drive FAQ
- How to check the user name that is used to access the shared folder?
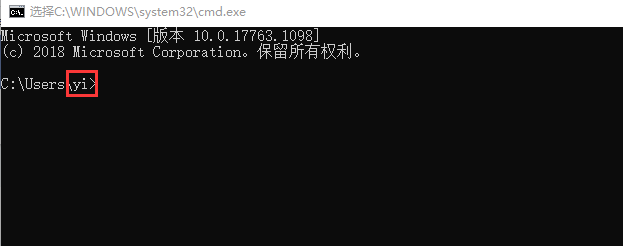
- On the Windows PC where the shared folder is created, press WIN + R key to open the Run Window.
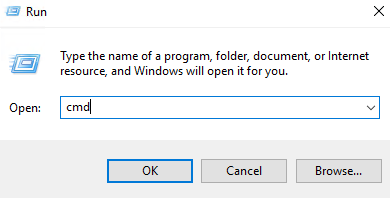
2. Enter cmd command and click OK.
The user name is displayed on the Command Prompt.
