SNMP
Simple Network Management Protocol (SNMP) is an application–layer protocol, which is used to manage and monitor network elements and exchange management information between network devices. By default SNMP uses port 161 for communication.
Since the inception SNMP, it embraces three versions: v1, v2c and v3. V1 and v2c are the most implemented version of SNMP; v3 is target at the high security when compare to its older versions. The gateway support private SNMP MIBs (private enterprise number) to access.
1 Parameters in SNMP setting
Table 1Definition of SNMP setting
| Options | Definition |
| SNMP Enable | Whether to enable SNMP |
| System Contact | System contact information(optional) |
| System Location | The locale of system contact(optional) |
| Private Enterprise Number | The number is used for defining private SNMP MIBs which is assigned by Internet Assigned Numbers Authority (IANA). For more information, please access: |
| SNMP Version | Select version of SNMP |
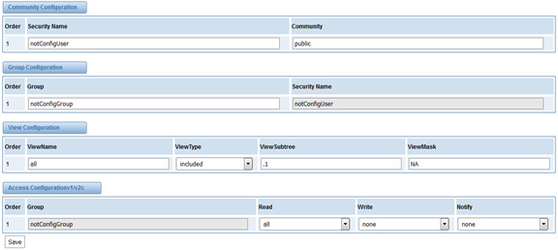
| Community Configuration | Define a community name to security name |
| Group Configuration | Define the security name to a group |
| View Configuration | Set a view to let the group have rights to do |
| Access Configuration | Grant the group can access to the view(read/write/notify) |
| User Configuration | Only exist in v3. Add a v3 account to SNMP. Notice that the length of auth password and privacy password are more than 8. |
2 Activating SNMP
Usually, the feature is disabled by default. To activate the SNMP feature, please follow the Figure 1.
The Interface is in the ADVANCED->SNMP. System contact, location and private enterprise number are optional. Figure 1 is the SNMP setting interface.


Figure 1 Activating the SNMP
Note: Do not forget to click ‘Save’ to take effect. After configuration, The SNMP feature is activated immediately.
3 Verify SNMP
A powerful, indispensable and easy-to-use MIB browser is convenient for engineer/manager to manage SNMP enabled network devices and applications. In this session, Manage Engine MIB browser is selected. It allows user to issue SNMP requests to retrieve agent’s data, or make changes to the agent. It is free tool for Windows, Mac and Linux.
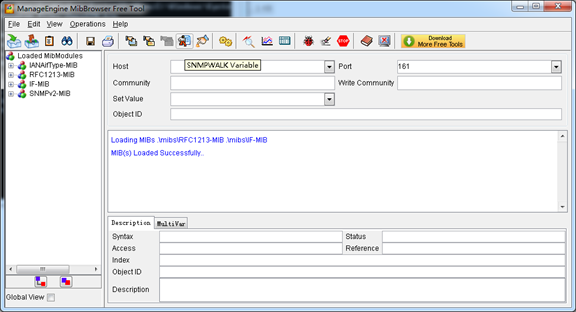
(1). Get SNMP parameters via SNMP MIB browser. It’s supposed that Manage Engine MIB browser is installed perfectly. Figure 2 is the main interface of Manage Engine MIB browser.

Figure 2 Manage Engine MIB browser
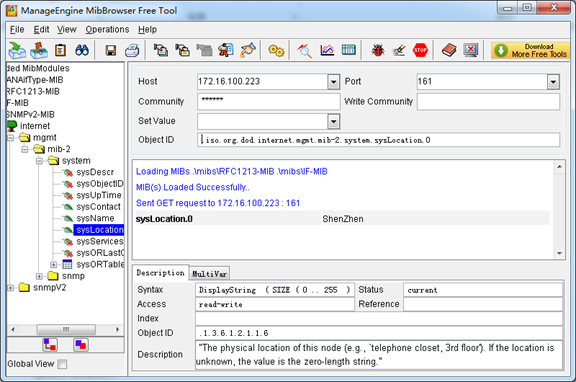
And the field of Host, Port and Community are filled with 172.16.100.223, 161 and public respectively. Object ID is the node of SNMP MIBs, e.g. “.1.3.6.1.2.1.1.6.0” is system location and “.1.3.6.1.2.1.1.1.0” is system description.

Figure 3 Get system location
After the rest field has been filled, then verify it. Click Operations->GET to get the value of system location and it returns the value which we just set.
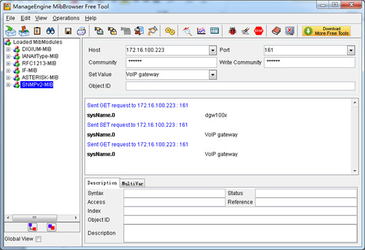
(2). Set SNMP parameters via SNMP MIB browser. For example, set the system name. system name is “dgw100x” by default, then set it as “VoIP gateway”. See figure 4.
- Click Operations->GET to attain the current system name.
- Fill the field of Set Value with “VoIP gateway”.
- Click Operations->SET to set the system name.
- Click Operations->GET to attain the modified system name.

Figure 4 Set system name
