How to use Auto Provisioning
Auto provisioning or auto-configuration is an easy, flexible and time-saving way to upgrade firmware and configurations for E1 gateways in mass deployment. With auto provisioning, all user information can be entered via the central ACS (Auto Configuration Server). ACS can be DHCP server or TFTP, HTTP and FTP server. It will not take effects immediately but in the next time system is power on. It could be postponed the execution of restart system also.
Note that system will not be upgrade the firmware and update configurations if the connection between ACS and gateway is disconnect.
1 Preparation
The following should be prepared before anto provisioning being applied.
- Enable the auto provisioning in gateway
- The ACS has been prepared
- The network between gateway and ACS is connected
2 Configuring gateway
Usually, the feature is disabled before being on sale. To activate the auto provisioning function, please follow the procedures as below.
Step 1 On the ADVANCED-> Auto Provision interface
Step 2 Enable the ‘Enabled’ option and select ACS. DHCP option 66 can be enabled if ACS has been work as DHCP server, otherwise please select protocol of provisioning and fill the value of ‘Auto Config Server URL’. Username and password may need to be filled in FTP/HTTP for the purpose of system safety. Do not forget to select Firmware upgrade, upgrade mode and fill the value of timeout, and click ‘Save’.
Step 3 Set interval of checking in LOGS->System notice then enable it, and click ‘Save’.
Table 1 Definition of Auto Provision
| Options | Definition |
| Enabled | Whether to enable or disable Auto Provision |
| DHCP Option 66 | Get ACS server address from Option 66 via DHCP |
| Protocol | Set protocol of connection |
| Auto Config Server URL | The config server domain or IP address |
| User Name | The account of downloading from ACS |
| Password | The password of downloading from ACS |
| Timeout | The max limit time for downloading firmware |
| Firmware Upgrade | Enable/disable the mode of downloading firmware |
| Upgrade Mode | Select upgrade time.
Power: start upgrade configuration when Power on. Power + Period: Set the frequency of checking the latest configuration when gateway running |
Table 2 Definition of system notice
| Options | Definition |
| Enable | Whether to enable or disable system notice |
| Check Interval | When Upgrade Mode is set, this parameter specifies the interval of Checking. |
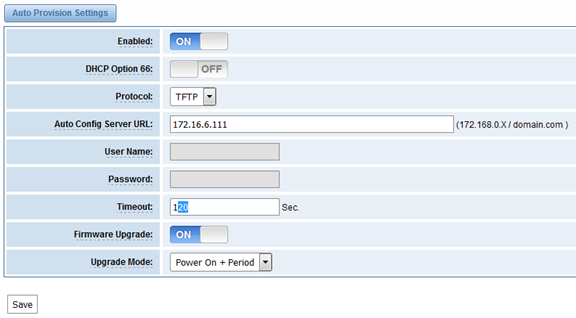
Figure 1 Auto Provision interface
3 Configuring ACS
The Auto Configuration Server can be the one of TFTP, FTP and HTTP server. The ACS is used to store the firmware release and configurations files of the devices under management.
List the primary files in ACS download directory as table 7-4-3:
Table 3 Definition of ACS files
| Options | Definition |
| DGW100x-current.bin | The firmware image |
| common.conf | The wildcard configuration file for the whole gateway |
| defconfig.tar.gz | The default(factory) configuration file |
| EPC-{mac}.conf | The private configuration file for the specified gateway.
Naming rules: “EPC-“ + “mac” +”.conf”. The naming prefix of “EPC-” stands for the private configuration file, “mac” is the physical address of network interface card but removed semicolon and “.conf” is the suffix. For example, the EPC-a0980501dbca.conf, ‘a0980501dbca’ is the MAC address (A0:98:05:01:DB:CA). |
The format of common.conf , EPC-{mac}.conf and defconfig.tar.gz:
(1). Common.conf
[firmware]
FW_NAME=DGW100x-current.bin //Firmware image name
FW_MD5=b3603f3c3b5e7eb6326498640f151c79 //The md5 of firmware image
FW_VERSION=1.1.2 //Firmware version
[configs]
CONFIG_NAME=defconfig.tar.gz // default configuration file(compressed)
CONFIG_MD5KEY=2cd2dfbe52482405350816e3698cb530 // the md5 of default configuration file
(2).EPC-{mac}.conf
[dns]
DNS_SERVER1=8.8.8.8
DNS_SERVER2=8.8.4.4
DNS_SERVER3=
DNS_SERVER4=
[ntp]
NTP_SERVER1= 0.cn.pool.ntp.org
NTP_SERVER2= time.nist.gov
NTP_SERVER3= time.windows.com
[eth0]
ENABLE=yes
TYPE=static
DHCP=no
IPADDRESS=172.16.100.223
NETMASK=255.255.0.0
GATEWAY=172.16.0.1
[eth1]
ENABLE=yes
TYPE=static
DHCP=no
IPADDRESS=192.168.100.223
NETMASK=255.255.0.0
GATEWAY=192.168.0.1
[web_login]
username=admin
password=admin
(3). Defconfig.tar.gz

Figure 2 the overview of defconfig.tar.gz\
4 Provisioning example
After auto provisioning is enabled, the gateway will visit the Auto Configuration Server and download the updated files periodically based on the timer Check Interval (LOGS->System notice). By default, the timer is set as every hour. System will receive a message from ACS, like figure 7-4-3, and the message will be display in the system notice (LOGS->System Notice).
Auto provisioning will not take effects immediately but in the next time system is power on. It could be postponed the execution of restart system also.
Now, an example of using Auto Provisioning will be given in the following.
- Activate the auto provision (TFTP) in ADVANCED-> Auto Provision like figure 7-4-4.
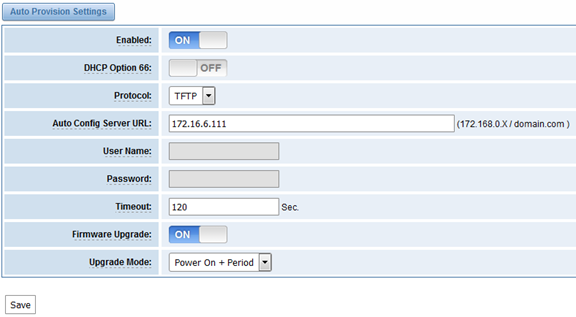
Figure 4 Auto provision settings
- Enable the check interval in LOGS->Log settings->System Notice like figure 5.
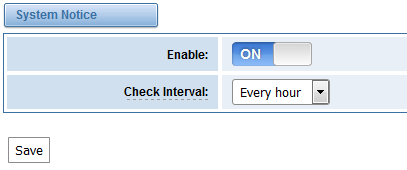
Figure 5 Check interval setting
- Configuring the ACS(Generate the md5 of firmware and defconfig.tar.gz)
- Copy the firmware, defconfig.tar.gz, common.conf and EPC-{mac}.conf to the working directory of TFTP server.
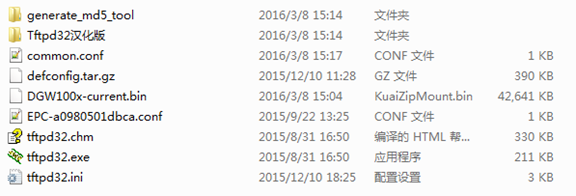
Figure 6 The working directory of TFTP server
Notice:
The demo of E1 gateway mac address is A0:98:05:01:DB:CA (eth0), therefore the private configuration file is EPC-a0980501dbca.conf.
- Generate the md5 of firmware and defconfig.tar.gz. Then fill in common.conf and EPC-{mac}.config.
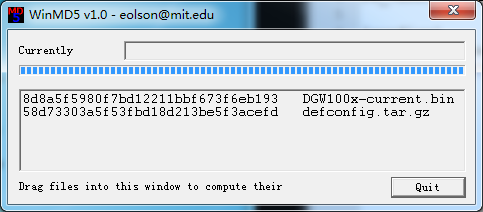
Figure 7 Generate the md5 of firmware and configuration
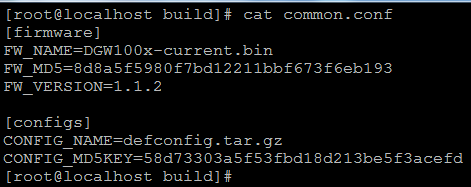
Figure 8 Common.conf
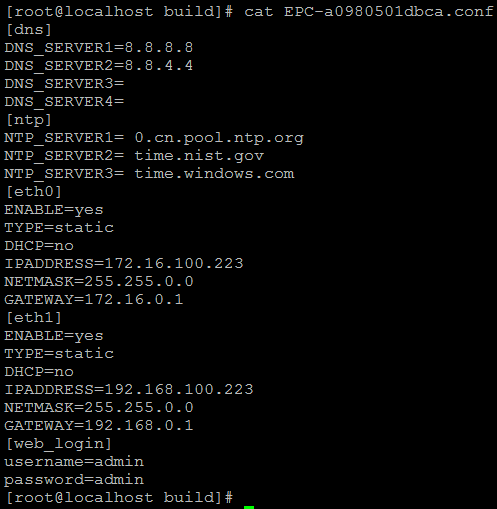
Figure 7 EPC- a0980501dbca.conf
- Start TFTP service. Tftpd32.exe is a useful TFTP tools in windows7, then make sure TFTP server is select.
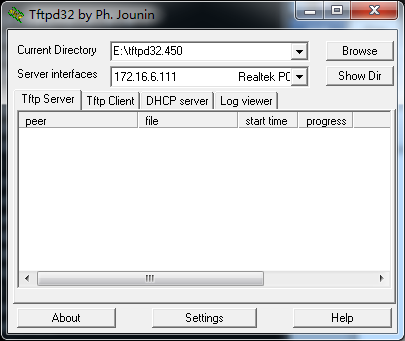
Figure 8 Demo TFTP server
- The system will receive an auto provision message in web GUI.

Figure 9 System notice logs
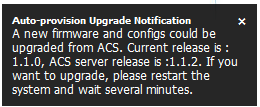
Figure10 Auto provision upgrade notification
- Restart the system. It will take about 3 minutes almost to download, upgrade Firmware and update configurations.
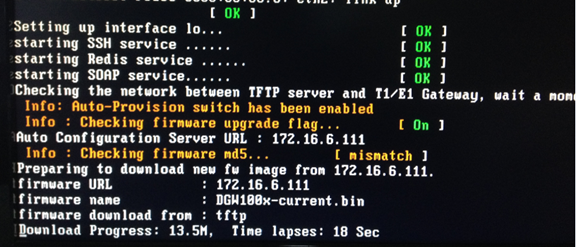
Figure11 Downloading the firmware and configs

Figure 12 Applying the firmware and configs
