Navigation: Fault Management > Emergency Maintenance > Common Operations > Replacing Parts >
MTU and SCU boards of X1911/X1960/X1981 both provide SD card slots for housing the SD cards. The SD card on the MTU board is used for storing VMS recording files, while that on the SCU board is used for storing system announcement files.
Confirming the Operation Feasibility
Before replacing an SD card on the device for rectifying a fault or maintaining the device, confirm the operation feasibility according to the following points:
ϒ⁄The spare SD card is available in the warehouse.
ϒ⁄You are familiar with the process of replacing an SD card.
Obtaining the Spare Part and Tools
After confirming the operation feasibility, obtain a spare SD card, an ESD wrist strap, and a Phillips screwdriver.
Confirming the Position of the SD Card to Be Replaced
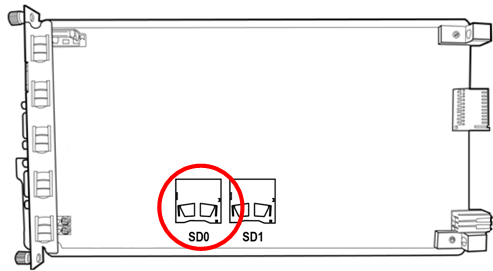
Before removing the SD card to be replaced, confirm the slot where the board that houses the SD card is installed, locate the board, and attach a label to the board panel for identification. The MTU and SCU boards each have two SD card slots. Figure 1 shows the available SD card slot.
Figure 1 Available SD card slot

Replacing the SD Card
1.Remove the board that houses the SD card to be replaced. For detailed operations, see Removing the Original Board.
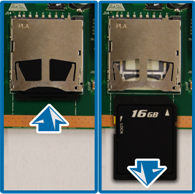
2.Remove the SD card from the board, as shown in Figure 2.
Figure 2 Removing the SD card

3.(Optional) Format the SD card.
![]()
After you remove the SD card, it is recommended that you format it to avoid information leak.
a.Insert the SD card into the USB port of a PC through a card reader.
b.Choose Start > Computer. Right-click the SD card and choose Format.
c.After the SD card is formatted, remove it.
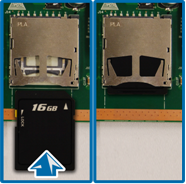
4.Take the new SD card out from an ESD bag, and insert it into the SD card slot of the board, as shown in Figure 3.
Figure 3 Replacing the SD card

5.Install the board back into the shelf.
Parent Topic: Replacing Parts