MAG1000 Analog Gateway Quick User Guide
OVERVIEW
OpenVox MAG1000 is a multifunctional analog gateway for seamless connection between IPPBX, fax machines, analog phones, and operators. It provides three interfaces of RJ11/RJ45/RJ21, covering almost all the wiring needs of users in all scenarios. In addition, it has excellent full concurrent voice/ fax processing capabilities, strong performance, and high stability, and provides high-quality call services for operators, enterprises, call centers, and residential users in residential communities.
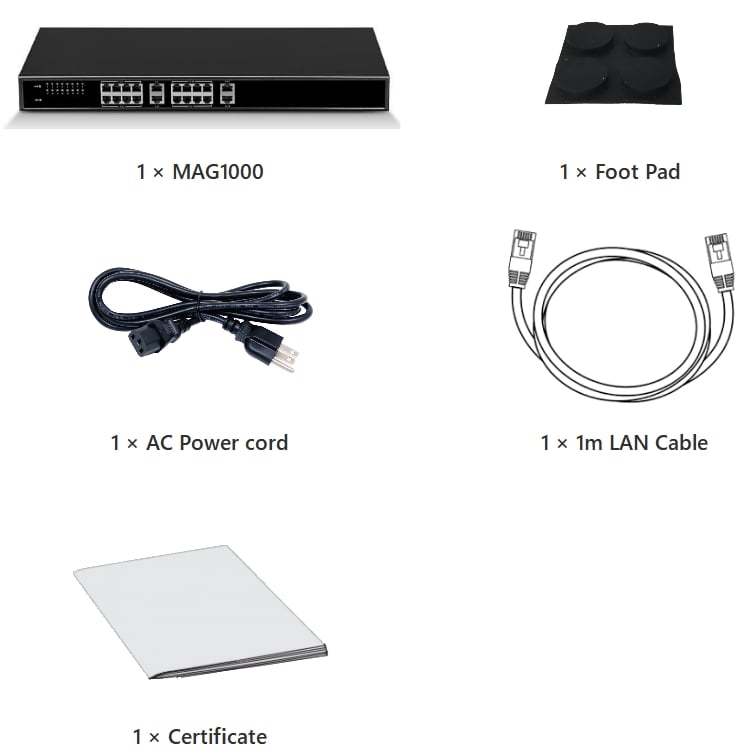
PACKAGE CONTENTS

MAG1000 PORTS
1:Running status indicator
2:Power status indicator
3:Channel status indicator
4:Analog interface

1:Power
2:Power switch
3:Grounding port
4:Run indicator
5:PWR indicator
6:RST button
7:Serial port
8:Network port
9:RJ21 1-24 port
10:RJ21 25-32 port
CONNECTING THE MAG1000
The MAG1000 is designed for easy configuration and easy installation. To connect the MAG1000, please follow the steps above:
1. Plug a standard RJ11 telephone cable into the phone port and connect the other end of the telephone cable to a standard touch-tone analog telephone.
2. Plug the Ethernet cable into the LAN port of the MAG1000 and connect the other end of the Ethernet cable to an uplink port (a router or a modem, etc.)
3. Plug the power adapter into the MAG1000 and connect it to a wall outlet.
4. When the phone adapter is ready for use, the Power, Ethernet, and phone LEDs will be solidly lit.
CONFIGURING THE MAG1000
The MAG1000 can be configured either through the PC’s Web browser using the embedded Web GUI or using the IVR voice prompt menu.
Obtaining the IP address
The MAG1000 is configured with DHCP by default. To know the IP address of the MAG1000, you can refer to the following steps to obtain an IP address.
1. Using an analog phone, connect to any of the phone ports.
2. Press ** (press the star key 2 times) will announce the current IP address. The default is to broadcast the IP in English.
Configure by Web GUI
Via LAN1 Port
If your MAG1000 is connected through LAN1 port, please refer to the following steps.
1. Power your MAG1000 with the correct size AC/DC.
2. Open a web browser on your computer.
3. Enter the IP address of the MAG1000 into the address bar of your browser.
4. Enter the administrator password to access the Web Configuration Menu. (By default, the administrator user name and password are admin).
Note: The computer must be connected to the same subnet as the MAG1000. This can easily be done by connecting the computer to the same hub or switch as the MAG1000.
Via LAN2 Port
If your MAG1000 is connected via the LAN2 port, please refer to the following steps.
1. Power up your MAG1000 with the correct size AC/DC.
2. Open a web browser on your computer.
3. Enter the default LAN2 IP address (172.16.99.1) into the browser address bar.
4. Enter the administrator password to access the Web Configuration Menu. (By default, the administrator user name and password are admin).
Note: Please make sure your computer has a valid IP address in the range of 172.16.99.XXX so that you can access the Web GUI of MAG1000.
Configure by the IVR
1. Using an analog phone, connect to any of the phone ports.
2. Pick up the handset and dial “*3*” to configure the IP address using IVR.
3. Follow the prompts to set DHCP or Static IP, here is an example of Static IP setting.
- Pick up the handset and dial “*3*” to configure the IP address using IVR.
- Press 2 to set the static IP (192.168.1.11).
- Set IP: Press 192168001011, three digits do not need to fill in the full number 0, vacant need to fill in the 0.
- Set subnet: 25525525255000.
- Set the gateway: can be omitted, press 0.
- After setting correctly, wait for the device to start normally, use the analog phone, pick up the handset and dial “**” to check whether the modified IP address works.
Note: This IP address setting is only valid for MAG1000 LAN2, and for LAN1, you need to go to Web GUI to set the IP address.

