New Version of Digital Gateway Connects To FreePBX
This document provides a detailed description of the steps required to integrate a digital gateway with FreePBX. Follow the steps below to configure two-way communication between the phone and the gateway:
Outgoing calls: From the FreePBX SIP extension 2001, the call is routed through trunk 10000 to the gateway
Incoming calls: Calls from external lines are routed to the gateway, then through SIP trunk 10000 to FreePBX, and finally forwarded to SIP extension 2001 via FreePBX

Step 1. Create an extension (2001) and a trunk in FreePBX
 Under Applications->Extensions, add an extension.
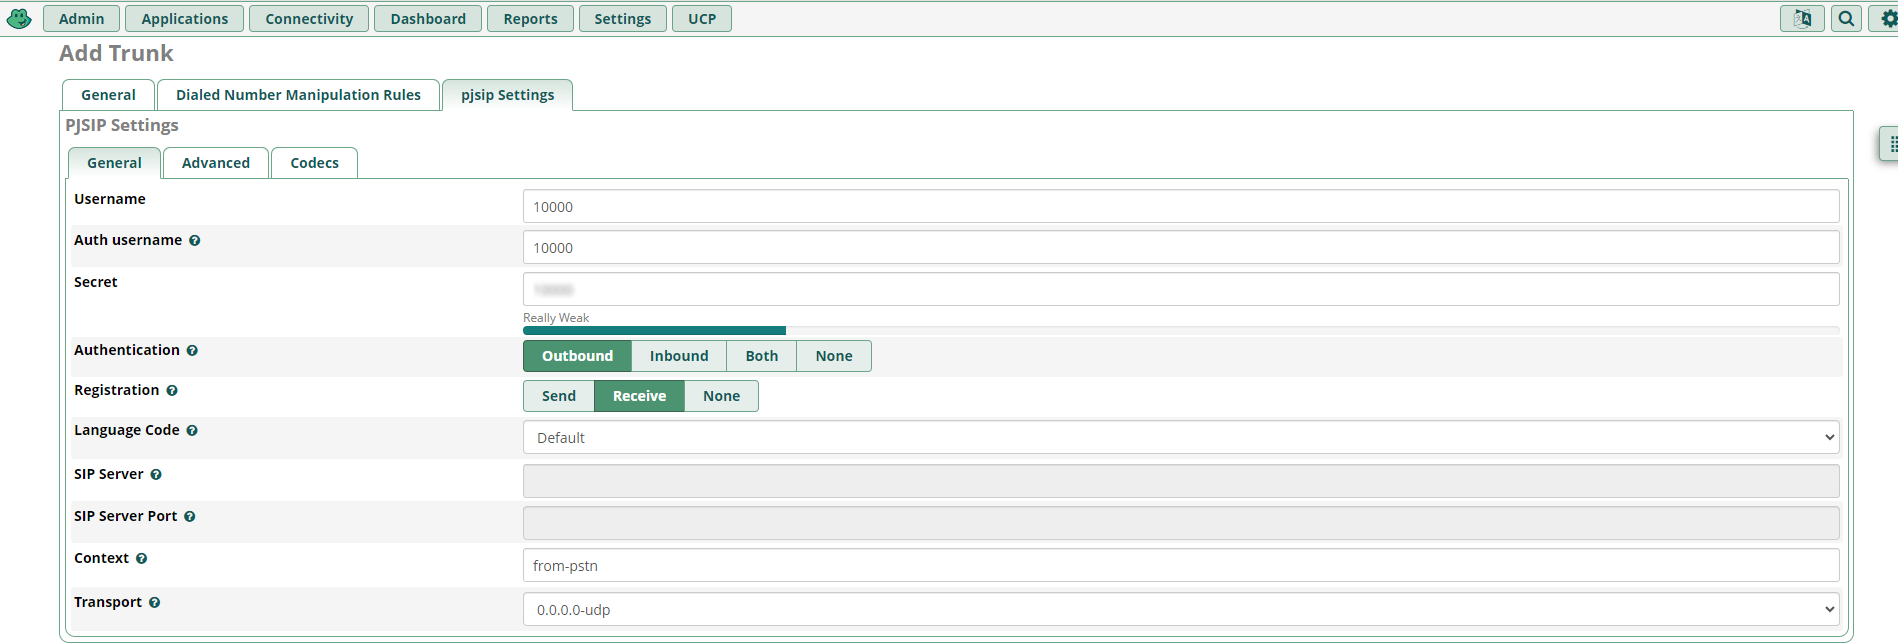
Under Connectivity->Trunks, select SIP (Pjsip_SIP).

 In the pjsip settings interface, enter the following information
Step 2. Create inbound and outbound routes on FreePBX
Under Connectivity->Inbound Routes, add an inbound route and set the destination to extension 2001.

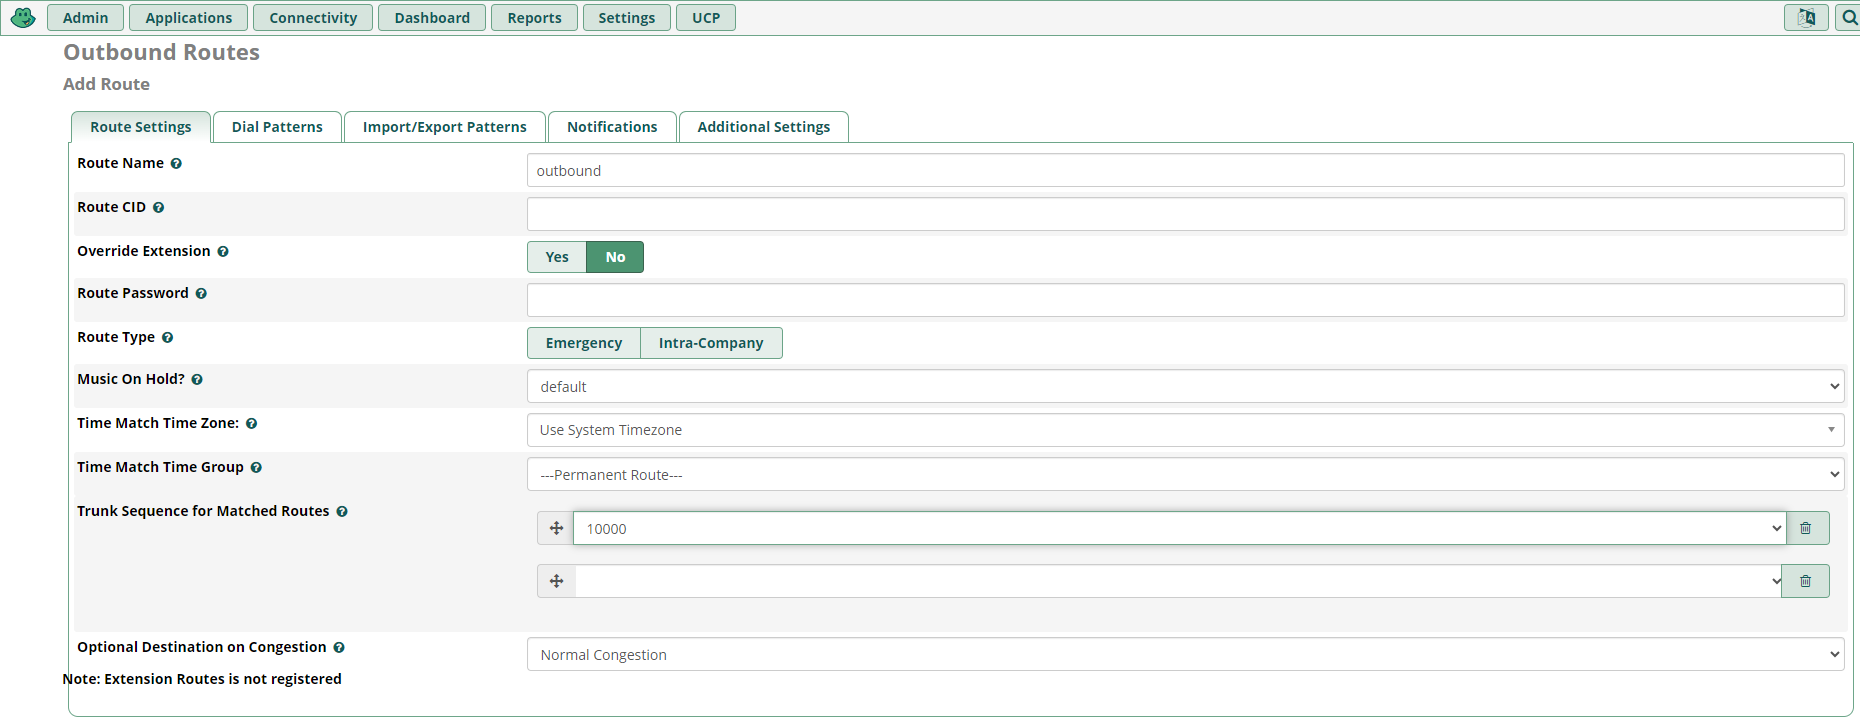
 Under Connectivity->Outbound Routes, click the Add button to add an outbound route and set the destination to SIP trunk 10000.
Step 3. Create a trunk on the digital gateway

Select an easy template and enter the IP address of FreePBX.

Under Trunk Settings->SIP Trunks, add a SIP trunk.

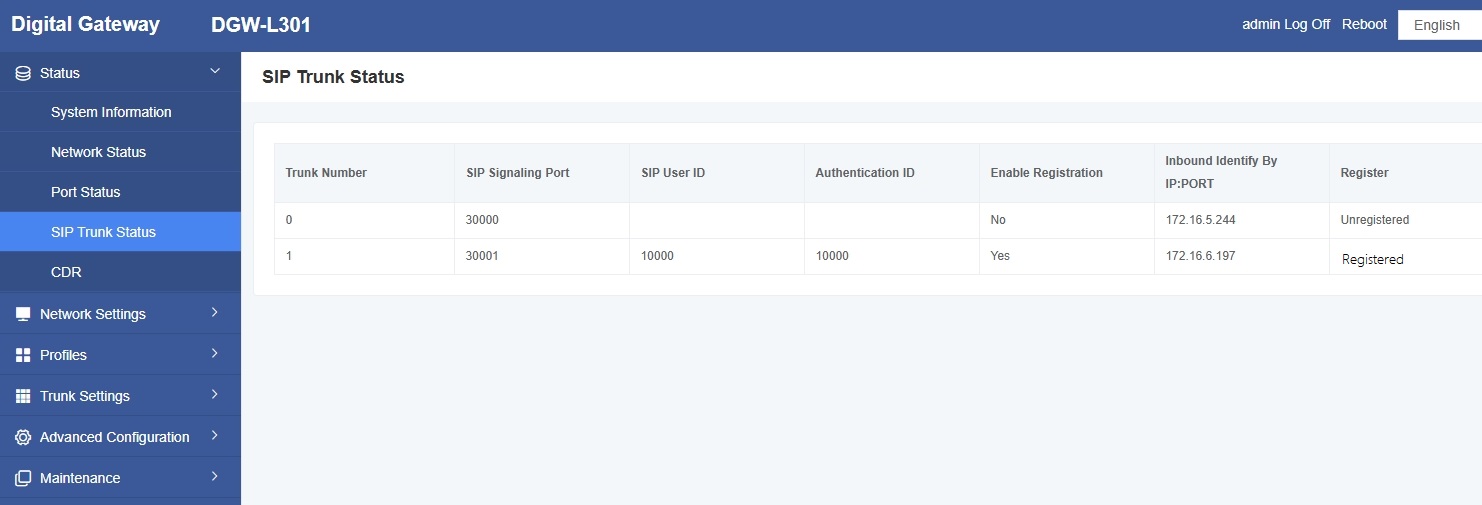
After adding and saving successfully, you can see this trunk under Status->SIP Trunk Status, and its status is OK.
Step 4. Create incoming and outgoing call routes on the digital gateway

Under Profiles -> Profiles 1 -> IP -> Tel Routes, add an incoming call route.

Under Profiles-> Profiles1 -> Tel -> IP Routes, add an outgoing call route.
Call test:
Use SIP software such as Xlite or eyeBeam to register the SIP extension (2001). After completing the above steps, you can try making a call.
Incoming call test: Use your phone to dial port 1 on the gateway and see if 2001 rings. If 2001 rings, the configuration is successful; if 2001 does not ring, there is an issue with your configuration. Please check the configuration.
Outgoing Test: Use the 2001 extension registered on the softphone to call your mobile phone number. If your mobile phone rings, the configuration is successful; if your mobile phone does not ring, please check your configuration.
