Auto Provision for OIAD
1 Overview
1.1 Functional definitions
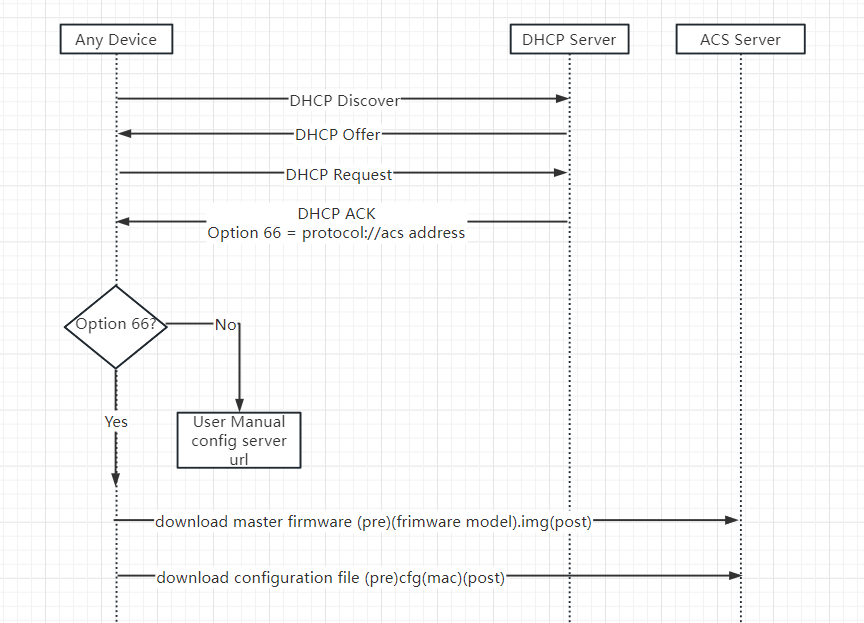
The analog gateway device supports remote Auto Provision, which allows remote centralized management of device configuration and firmware upgrades directly over the network. In this deployment mode, the user manages and stores the firmware upgrade packages and device configuration files on the Auto Configuration Server (ACS), and the device periodically accesses the ACS during power-up or according to the configuration and automatically downloads the latest firmware packages or configuration files.
1.2 Functional Flow
When deploying devices remotely through the automatic management function, you need to set up an ACS server (TFTP server) , and need to meet the following conditions:
- Allow all devices to access the ACS server via public or private network.
- Configuration files and firmware upgrade packages are stored on the ACS server.
- The device can obtain the URL of the ACS server through either of the following two ways:
(1) via DHCP option 66
(2) Preset in the device so that the device can access the ACS server after the first power-up or after each reboot if the Remote Auto Management feature is enabled on the device.
2 Setting up the ACS server (TFTP)
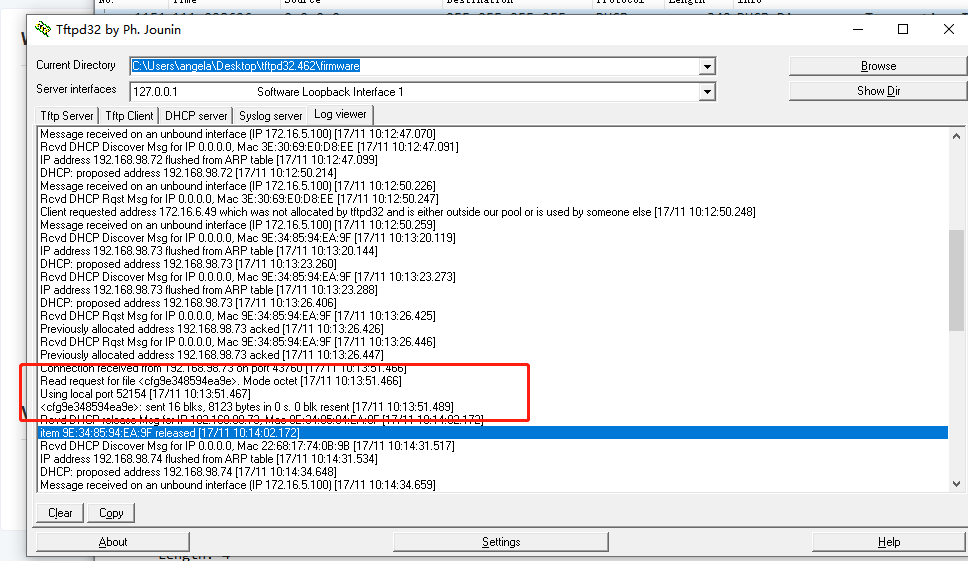
The device supports downloading configuration files using the TFTP protocol.
Build TFTP server software commonly used 3CDaemon and Tftpd32, both software can be used in the Windows platform for free. The following Tftpd32 software as an example to explain (this software can also build DHCP server).
Step 1 Create a folder as the TFTP server root directory on your local computer and place the configuration file or firmware upgrade package in that directory.
Step 2 Download and install Tftpd32 and open the application.

Step 3 Click “Settings > TFTP”, in the “Base Directory” field, select the root directory address of the server (the path where the configuration files and firmware upgrade packages are stored), and check “Bind TFTP to this address” to select the IP address of the TFTP server. “Bind TFTP to this address” to select the TFTP server IP address.

3 Preparing the configuration file
3.1 Description of profile types
Master firmware file name rules for (pre) (firmware model).img (post), interface board firmware file name rules for (pre) ixu (mac).img (post), configuration file name rules for (pre) cfg (mac) (post), pre is the prefix, post is the suffix. Note: prefix suffix can be left empty, but mac and firmware model can not be empty.
For example, master firmware is icvp-v1-squashfs-sdcard-a307b45d.img, then firmware model will be icvp-v1. Device mac is A0980502D0A2, If you set pre as my and post be empty. Then master firmware file name will be myicvp-v1.img. Configuration file name will be mya0980502d0a2
3.2 download configuration file
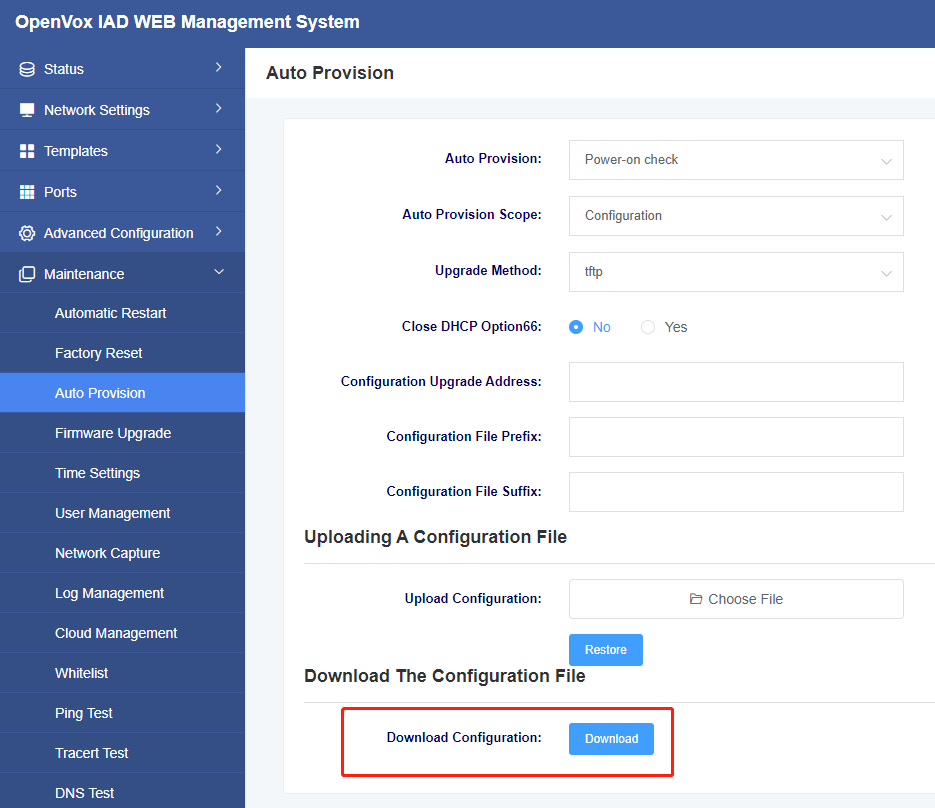
You can download configuration file and then edit this file.
3.3 Configuration file content format
The content format of the config file.
For system parameters, pls visit here Auto Provision System Parameters
For network parameters, pls visit here Auto Provision Network Parameters
4 Obtaining an ACS URL
4.1 Manual configuration
The device obtains the configuration file and firmware from the manually configured ACS server link address.

Step 1 Log in to the web interface of the device, click “Maintenance > Auto Deploy”, and set “Firmware Upgrade Address” and “Configuration Upgrade Address” in the expanded parameters. Select the auto deployment method and range

| Server Type | address format |
| TFTP server | ACS Address |
Step 2 Set the file prefix and suffix according to the file type.
take note
- The ACS address can be an IP address or a domain name. If the address is a domain name, you need to configure a domain name resolution server: Log in to the web interface of the device, click “Network Configuration > Basic Settings” to configure a domain name resolution server.
- Protocol headers tftp, http must be lowercase.
- If the device is configured to obtain and manually configure ACS address links via DHCP at the same time, the priority is given to obtaining ACS address links carried by DHCP.
4.2 Autodiscovery via DHCP option 66
When the device is in a network environment where addresses are obtained through DHCP, you can configure the address of DHCP option 66 on the DHCP server to be the address of the ACS. The device automatically detects DHCP option 66 to obtain the ACS server address link.
If the existing DHCP server does not support DHCP option 66, you can build another DHCP server to configure it, see step 1.

take note
If ”Get ACS address via DHCP option 66” is turned on on the interface and the ACS address is manually configured, the device will first try to get the ACS address from the message from the DHCP server (option 66), and use the manually configured ACS address if it cannot get it.
Step 1 Install DHCP server software on your PC, take Tftpd32 for example. Open Tftpd32, click “Settings > GLOBAL”, check “DHCP Server”. Then click “Settings > DHCP”, make the following configuration, and click OK.
Note: For tftp tool, when it works as TFTP server and DHCP server, no need to add option 66 in Additional Option, cause it will send option 66. But if you don’t use this tool, you need to add option 66 in your DHCP server.
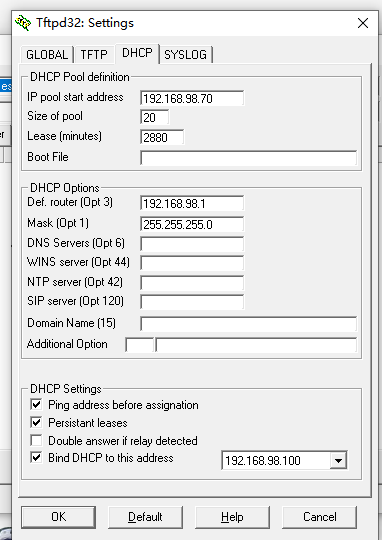
| name (of a thing) | clarification |
| IP pool starting address | Assignable starting address. |
| Size of pool | Total number of assignable addresses. |
| Win/DNS server | DNS server address. |
| Default router | Default Route Address. |
| Mask | The subnet mask corresponding to the assignable address segment. |
| Additional Option | Extended parameter carried by DHCP. You need to set it to 66, and set the address to that of the TFTP server. |
| Bind DHCP to this address | Check the box to select the DHCP server IP address. |
Step 2 Log in to the web interface of the device, click “Network Settings > Wan Settings”, select “dhcp” as the network type, set OPT 60, and submit.

Step 3 Log in to the web interface of the device, click “Maintenance > Auto Deploy”, and set the file prefix and suffix according to the file type.

Step 4 Reboot device
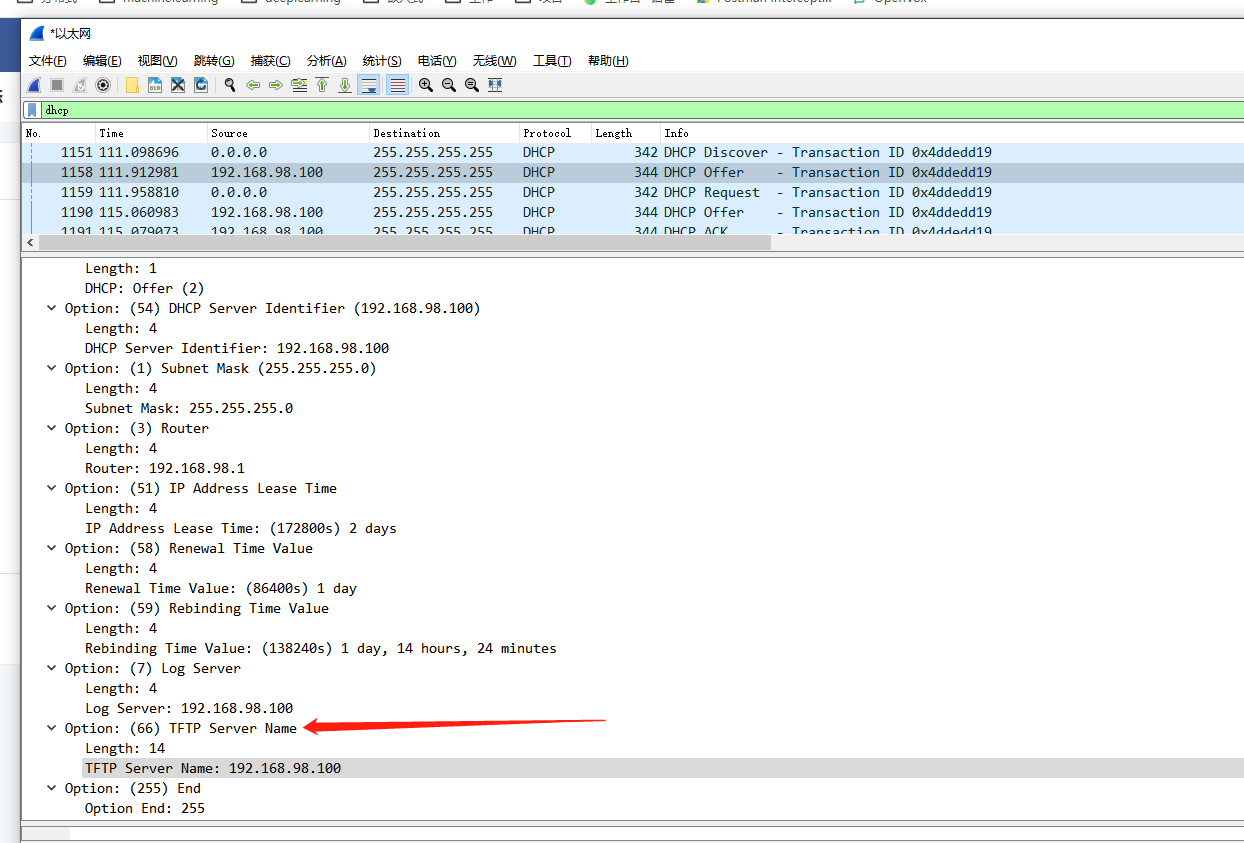
Finally, If you fail to use this function, you can capture network in your DHCP server.
This is network package captured in my DHCP server, you can see DHCP send option 66 in Offer .
