Connect multiple devices via N2N
Connect multiple devices via N2N
This document mainly introduces how multiple devices are connected to each other, which enables remote management of devices. This document takes UC200 and WG1032 as an example.
1. UC200 Setup
Enter the web interface of UC200, fill in the relevant information in Services->N2N(V2), check the box of Enable, the ip address of the network card can be set arbitrarily by yourself, in this example, it is 10.10.100.50, and the subnet mask of the network card is 255.255.255.0, and the IP address of the main node is n2cn.openvox.cn, which is a test server address provided by us for free, and the port number of the main node is 10086, and the virtual network name and key can be set freely, in this document, it is openvox/Abc123, and check the box of Allow packet forwarding. The IP address of the master node is n2cn.openvox.cn, which is a test server address provided by our company for free, the port number of the master node is 10086, the virtual network name and key can be set freely, and in this document, it is openvox/Abc123, and the Allow Packet Forwarding is ticked. The configuration is shown in the figure below, and the settings on UC200 have been completed.
Note: The IPs of the devices to be networked should be under the same network segment, and the virtual network name and key should be consistent.

2. WG1032 Settings
Enter the web interface of WG1032 and fill in the relevant information in Network->VPN. Select the VPN type as N2N VPN, the rest of information is the same as on UC200, and change the Local ip to 10.10.100.70. You can observe whether you are connected to the server through the connection status.

3. Local computer settings
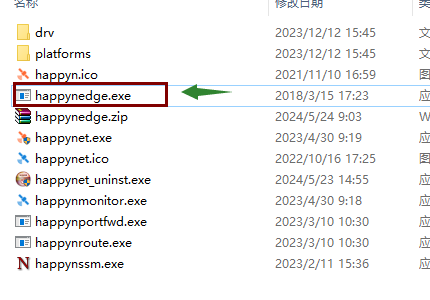
Download the link VPN tool below and install it, replacing the file in the installation directory. The replacement file is in the appendix.

Run this VPN tool after the replacement is complete and fill in the relevant information, as shown below, the IP address is 10.10.100.125 and the rest of the information is the same.

4. Testing network connectivity
Open cmd, try to ping the IP address of UC200 and WG1032, if ping through proves that the connection is successful.

5. UC200 PBX and wireless gateway docking
(1) Creating SIP trunk on the UC200
Create a SIP trunk in account mode under Trunk->SIP Trunk on the web interface of UC200, and enter the information as shown in the figure below, and set the trunk name, user name and password according to your preference.

(2) Wireless gateway interfacing with PBX trunking
On the web of WG1032, under VOIP->VOIP Endpoints, click Add new SIP Endpoint, the specific information is shown below, the name, user name and password are the same as those on UC200, the registration method is selected as Client, the domain name or IP address is the IP address 10.10.100.50 of UC200, and the port is 5060, and click Save& amp; Apply.

(3) Verify SIP trunk status
On the web of UC200, click Trunk->SIP Trunk and observe the trunk status, as shown in the figure, the docking is successful, if it is not working, please check whether the rest of the configuration is correct.

On the WG1032 web, click System->Status to find the SIP Information column and observe whether the SIP status is registered successfully.

Appendix
http://image.openvox.cn/misc/happynedge.zip
